
Pixel Crochet
What is it & My Version of How to do it.
![]()
I had found a book a few months ago called.. Pixel Crochet by Hannah Meur. This was during my learning how to C2C and I had to buy it. There’s fun 8-bit photos & basic instructions on how too for pillows, blankets, cushions, etc. After reading threw this book the possibilities of what you can create are endless. All that’s required is just an imagination, graph paper and lots of patience for sewing in ends 😉 lol
The Dog Bone mat I made is based off of a blanket that was in the book. I down scaled everything to make it into a mat rather than a blanket. I needed something to put the dogs water dish on & my chi chi’s food dish as he is a dish pusher. He will start at one end of the kitchen with his dinner and by the time he is finished he will be at the opposite end lol.
Not only did a scale down the bone.. I also did a different square and shrunk the squares down to just around 2 inches each. It still came out alittle bigger than I wanted but it works.
Here’s my How To..


Pixel Crochet is..
8-bit or graph pictures and/or words made into a blanket, pillow, mat, etc ..practically anything you want to make it into. It is made up with small, medium or large squares depending on the size of your item. These squares are then sewn together to make a Pixel Crochet Item. This is a fun way for people that don’t want to crochet a large project. Making these squares is fast and easy. On the down side, unless you absolutely love to sew, its a little tedious to sew a bigger project together.
Most Pixel Crochet I found, including the book, has you use granny squares. I wanted a tighter square.. So I used The Block Stitch Square. Traditionally you use 2 or more colors for this square. I choose to keep it one color as I wanted the bone a single color and I didn’t want more ends than I had to have for my first project.
Block Stitch Square.. My Version for the mat. This is a Scaled down version .. Not the Normal pattern for this technique.

To make my squares smaller.. I used a 4mm hook and I modified the stitches.
Ch.3.. Counts as first DC
In starting Ch. make 2DC’s,Ch1
Make 3DC, Ch1.. 3 more times
For a total of .. 4 ( 3DC’s, Ch1
Sl St into top of first DC, Do not fasten off.
For demonstration.. I changed colors so you can see it better.

Round 2
Continue to Sl St thru next 2 DC’s & into the Ch.1 Space.
Chain 3.. ( counts as SC ,Ch2) then SC in that Same Ch1 space.. You should have a Ch3 & SC in that corner Ch1 space.
Ch.2, then in next corner…SC,Ch.2, SC. Do this in each Ch.1 Corner all the way around.
Sl St into the beginning Ch.2 corner made. Do NOT fasten off. You will be continuing to round 3. From here..

Ch.2, 2DC’s, Ch.1, 3DC’s into that first corner
*3DC’s in next Ch.2 Space – 3DC’s,Ch.1,3DC’s in next corner*
Repeat all the way around.. Sl St into beginning Ch.2 and fasten off.
Make sure to leave a Long Tail. I used the tails to stitch most of the blocks together to omit having even more tails to weave in at finish.
You should now have a Block Stitch square measuring no larger than 2 inches
![]()
To make this mat.. you will need. 58 tan squares for bone & 26 secondary color squares.

Now to put it all together 🙂 Starting with the Bone portion of the project. I worked in rows. After sewing together each row, I connected the rows together. It is entirely up to you and what you feel more comfortable with, as far as sewing the squares together. I chose to weave threw back stitch only as I wanted the Ridge of the Front stitch to still be very visible for texture.


First you are going to want to weave your tail threw the stitches til you get to the corner of the square
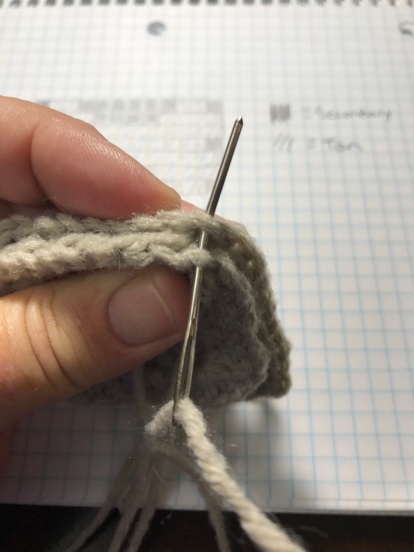
Then you are going to place 2 squares face to face and start weaving back loop to back loop.. back and forth all the way across. Do Not pull yarn tight while sewing. You will end up making your squares uneven and they will not lay flat. Fasten and weave in end when finished.


As you can see I have a bit of a ridge when you lay the pieces flat. Continue to sew pieces together with your Tail from the square. Make sure you are placing the squares all the same direction. Front to front or back to back.

Once you have the rows done you will need to use yarn to sew the rows together. You do not have to do it this way but It did save me from having to a ton of weaving when I finished.
Adding a border. I went around the mat 2 times using HDC’s then I added .. Repeat Crafter Me’s… Candy Cane border. I saw Sarah’s posts for this border and just fell in love with it so I had to try it 🙂 She has written instructions and a Youtube video for this technique. She Also has a post on Pixel Crochet using Granny squares if that option is more suited to your liking. Her Site link is HERE.
This Mat measures 29 x 16 without the border. If you would like it abit bigger you could always make your border a little thicker.
Pixel crochet is fun and great way to change things up once and awhile. I’ll be experimenting more with this and see what happens 🙂
Til Next Post… Thank you & Have a Great Day 🙂


I love the way it looks. I’ll save this tutorial for another day though. Thanks for sharing!
LikeLiked by 1 person
I like this a lot! cute rug. I never thought of making a picture out of squares. It’s got me thinking…
LikeLiked by 2 people
I wish my “to do” list wasn’t so long Sandi because I have like a million ideas for using this method!!! 😀
LikeLiked by 1 person
I’m in the same boat lol Sooo Many ideas but I’m still trying to play catch up from Irma evacuation & being sick, etc.. I’m at that Gaaahhhh moment lol
LikeLiked by 1 person